Monster Meat Pile

Okay, so…let’s just be honest here.   The hardest part about eating healthy?  At least for me?  Those days when you have so much to do, you have no time, you’re crazy hungry, and the drive through is RIGHT THERE.  Especially when you get home and it seems like there is nothing to eat!!  Well.  Here is one of our solutions.  Not saying that I am perfect and never cave.  To my shame I do that more often than Mr. Rodgers.  But this Protein Plate has saved me from stumbling so many times, because I have these items on hand at all times!!

Like a few of my other posts, this is a little less “recipe,” and a little more just me sharing an idea with you that has worked for me.  Obviously you can make your own version of this, as long as you keep a go-to for weak, hectic moments.


So here’s what I use:

  • Frozen Burger Patties
  • 2 Slices Bacon (Optional, I happened to have some the night I took these pics)
  • 1/2 Small onion
  • 1-2 Eggs


I think you can pretty much figure out the rest by checking out my pictures (sorry the lighting was bad, I was so hungry I didn’t have it in me to take the time to take really pretty pictures.  I am known for getting “hangry.”  You don’t want to mess with me when the hanger is upon me.

Basically, you just….

Photo-14

Heat up a cast iron skillet and toss in a frozen burger patty or two.  Slice your onions into strips, rub a little butter on the bottom half of the skillet and sauté the onions while your burgers cook.  I season both sides of my burger patties with salt, pepper, onion powder, garlic powder, and a little chipotle chili powder.

Photo-15

Toss some bacon in the pan too if you are using that.

Photo-16

A couple minutes before it is done, create an open space and crack an egg in there.

Photo-17

When it is all done, assemble your monster meat pile.  You will not be lacking in the protein area after this!  I always find it so satisfying!

Photo-18

Yay Yay Yay Yay!  What do you think of my idea?  And what do you do when you have no time but need some protein fast?

Flavorful Bacon Wrapped Chorizo Meatloaf

Those of you who follow me regularly know that it has been just a few weeks since my first chorizo experience.  In summary?  Lifechanging.  Because I have now vowed to eat chorizo all the time.  It has a beautiful flavor, it can be used so many ways…and I looked it up…no sugar added!!  Wooohoooo!!  Can’t get much better than that!


So here is chorizo cooking, round two!!  This was awesome.  You may remember my fear of meatloaf, because of growing up watching shows where the wife thinks her husband loves it…but he secretly pays the kids to eat it and they all shovel it into the dogs mouth when mom isn’t looking.  I don’t know why that is so etched into my mind, but alas.  I have meatloaf phobia.  But this…oh this meatloaf!  Talk about flavor, and my husband really did love it!!  I would know because I don’t have any kids for him to pay, and there was no meatloaf remains on my dog’s fur or breath.  😉  So I will confidently declare this recipe Mr. Rodgers approved!  Though it is wrapped in bacon, so that’s kind of a no brainer.   Speaking of bacon, I ate bacon for lunch.  That’s healthy, right?  :/

Anyways, back to meatloaf!


This recipe is inspired by the great paleomg.com!  I had originally intended on making it almost exact to the recipe…but some of the ingredients I had bought for this recipe I some how had a brain fart and used up in other meals.  So when I got to this meatloaf I realized I didn’t have a bunch of things, so I got to be spontaneous…dig through my fridge and use whatever veggies and things I could find!  Which is fun.  Feel free to adapt it to what you have available too!  So….


Here’s what you need:

  • 1 1/2 lbs Ground Beef
  • 8 oz Chorizo (that is about the size of one large “link” in the set of two I get at my store)
  • 1 Egg
  • 1/2 C Flax Meal
  • 2 Carrots, Chopped
  • 1/4 Onion, Chopped
  • 1 Celery Heart, Chopped
  • 3 Garlic Cloves, Minced
  • 4 Slices Bacon, Cut in half
  • Salt and Pepper
  • 1 tsp Garlic Powder
  • Optional: Chipotle Mayo to Garnish (I would have done this if I had time to make an approved mayo that Mr. Rodgers can eat, but I was in a hurry!)


And here’s how you do it:

  1. Preheat your oven to 350*
  2. Take all of your meatloaf ingredients (except the bacon and the mayo if you are using it!) and combine in a bowl.
  3. Dump this mixture into a loaf pan and form evenly.
  4. Lay the halved bacon across the entire top of the meatloaf, tucking it in as well as possible.
  5. Cook for about an hour and 15 minutes, then broil JUST long enough to get some crispiness to your bacon.  Broilers burn things FAST so watch it the whole time!

And bam!  You are ready to go with a meatloaf that husbands around the world will adore!! 😀

Let’s see some pictures!

Chorizo Loaf 1

Get your beef and chorizo!

Chorizo Loaf 2

Add the rest of your meatloaf ingredients (minus the bacon!).  Combine well!

Chorizo Loaf 3

Form it into a loaf pan.  Look at how it is marbled with the different meat colors, I love it!

Chorizo Loaf 5

Lay the halved bacon over the whole top surface of the meatloaf, tucking the edges in as well as you can.

Chorizo Loaf 6

Cook for an hour and 15 minutes or so, then broil just a few minutes to get crisp bacon!

Chorizo Loaf 7

Ahhhhhhh isn’t that just the best?!  I could go for some of that right now!!


Okay, so here are a few photos from the lovely Mr. Rodgers.  He was SO excited about this meatloaf that as I grabbed dishes and things to set the table, I turned around to him snapping pictures on his phone saying things like “Look at this steam!  You have to capture this before it goes away!!  LOOK at this!”  🙂  His enthusiasm made me so happy I just had to share some of his steam pictures…please forgive the slight clutter in the back ground!

image (3) image (7) image

Do you see the steam?!  🙂  Isn’t he just the cutest?!  And of course he WOULD take a picture with a guitar in the background.  😉


So there you go.  Yummy, healthy, paleo, Mr. Rodgers approved meatloaf with butt kickin flavor!  😀 😀 😀 😀


Cowboy Coffee Roast

Have I mentioned how much I love pot roast? I LOVE POT ROAST! I don’t think I could ever get enough.  It’s just so easy.  It’s pretty hard to mess up.  It makes your house smell so good.  And tis probably the most satisfying thing you could put in your mouth ever.  For real.

I am always searching for new flavor combos for a pot roast.  The possibilities really are endless.  But sometimes we just need a little inspiration.  So I was scrolling through the “beef” category on my Caveman Feast app, and nearly dropped the phone when I read “Coffee Roast.”  I have scanned those recipes so many times, how had I missed that?!  Of course I had to try it right away!  I slightly adapted this one…I added butter, hehe.  Cause I have my grandma’s Oklahoma blood in my veins.  And my husband regularly drinks coffee with butter blended in.  Sounds weird, I know.  But its creamy and delicious.  So I wanted to add that creamy delicousness!

My only regret is that I didn’t have better coffee!  It was delicious, as expected.  Tender  I used my mother in law’s morning coffee…she takes it a little weak, and I’m pretty sure it’s instant.  So I KNOW that if I still had some Peet’s left, or some of my husband’s potent, organic “Bulletproof” coffee, it would have been mind blowing!!  I can’t wait to try it again with said, high-quality coffee.  But at the end of the day, it was still a wonderful, mouth watering pot roast so I have to share!


So, here’s what you need:

  • 2-3lbs Roast
  • 2 Cups Strong, Fresh Brewed Coffee
  • 4 Tbsp Grassfed Butter
  • 5 Cloves Garlic
  • 10 oz Mushroom, Sliced
  • 1 Onion, Sliced
  • Salt, Pepper, and Mrs. Dash


And here’s how you do it:

  1. Brew your coffee!  Whisk butter into coffee until melted, combined, and frothy.
  2. Make slits deep into your roast for your garlic cloves.  Shove them far into the meat.  Season to taste with salt, pepper, and Mrs. Dash.
  3. Place roast and veggies in your crock pot and dump in the coffee/butter mixture.
  4. Cook on low for 8-10 hours.


Peectures:

Photo (5)

Prep!

Photo (8)

Brew your coffee and whisk in the butter.

Photo (6)

Cut slits into the roast, and shove in the garlic.  Season with salt, pepper, and Mrs. Dash.

Photo (9)

Put it all in a crock pot, cover, and cook for 8-10 hours on low. 🙂


High Protein Paleo Breakfast

Also known as the best dang omelet I’ve ever made (or eaten) in my life!!

Some of you may remember my recent story about the horrifying breakfasts I found Mr. Rodgers making because he was rushed and going for protein and health content…completely ignoring the TASTE factor.

This omelet is another result of my horror and determination…horror that I had allowed him to eat that stuff that he was creating, and determination to give him his taste back!!


And boy!  Did I ever nail it with this one!!  Sorry, I don’t usually brag, I promise I’m not arrogant…just really excited, yay!  Just so you know…all of this is coming from a person that traditionally doesn’t like omelets!  So without further ado…


Here’s what you need:

  • 2 Tbsp Grassfed Butter (Kerrygold)
  • 3 Eggs
  • 1/4 C Onion, Diced
  • 1 Clove Garlic, Minced
  • 2 Italian Sausage Patties, Diced (Check out my homemade recipe!)
  • About 1/3 Small Can of Tomato Sauce
  • Squeeze of Basil Paste (or use fresh if you have it)
  • 1/3 can Black Beans
  • Salt and Pepper
  • Avocado (For garnish)


And here’s how you do it:

  1. Crack eggs into a bowl and whisk.
  2. Melt half the butter in a pan over medium heat.  Add in onion and sauté until transparent.  Add garlic, stir, and sauté an additional 30 seconds or so.
  3. Add sausage patties, black beans, tomato sauce, and basil and stir, cooking for 2 minutes or so, until everything is heated through and the flavors can infuse a bit.  Put in a bowl and set aside.
  4. Melt the rest of the butter in your pan over medium heat.  Crack eggs into a bowl and whisk together, then dump in heated pan.
  5. Cook until starting to solidify most of the way in.
  6. Spoon as much filling as you can fit on one half of the egg “disk,” then fold the empty side over to make a little pocket!
  7. Carefully slide out of the pan onto your plate and garnish with sliced avocado.  Eat and be amazed!!  So much protein in one breakfast…AND so much flavor!!  BOOM BABY!!

Photo-22 Photo-23


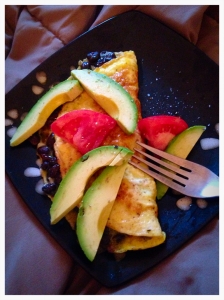
A Better Breakfast for Mr. Rodgers

There is a little bit of a story behind this one…as you can probably tell from the title, haha. “A Better Breakfast for Mr. Rodgers.”

Once upon a time, in a land not so far away…there was a princess who loved her sleep.  So even though her prince was trying desperately to eat healthy, she would let him take care of his own breakfasts so she could stay in bed an additional half hour or so.  Then one day she had to be up at the same time as him, and was horrified when she witnessed his rushed morning ritual.  (He has tried to convince me that it was worse than normal this day…but just the fact that he was willing to do this…agh!!)  See, the prince, after a long break from legumes, had recently decided to add beans back into his diet.  So quickly he scrambled some eggs, opened a can of black beans and dumped them on top (unrinsed,) then exclaimed “I need something green.”  Hurriedly he grabbed a Tupperware of salad from the day before picked out a couple of the onions, tossed it in a blender with some water, pulsed it a few times, poured it in a glass and chugged it.  While eating his goopy egg/bean mess.

Horrified.  The only word to describe my feelings on this occurrence.  So since then, I have been trying to get up at least more often to make “a better breakfast for Mr. Rodgers.”  Just because he is eating healthy doesn’t mean he has to eat “gross-ly.”  I am determined to bring flavor back into his breakfasts.  So I thought I would share my efforts with you!  Here is my first, which he thoroughly enjoyed and was quite easy I must add!


Here’s what you need:

  • 3 Eggs
  • 1/2 Avocado, sliced
  • 1/2 Lg Tomato, sliced
  • 1/4 C Onion, diced
  • 2 Cloves Garlic, Minced
  • 1/3 C Black Beans, rinsed!
  • Salt and Pepper
  • 1 Tsp Cilantro paste
  • Grassfed Butter for pans.

And here’s how yo udo it:

  1. Start by sautéing your onion until it is beginning to become transparent.  Add the garlic and stir, cooking for about another minute.  Add some salt, pepper, beans, and cilantro paste and stir to combine, cooking another minute or so.  Set aside.
  2. Crack eggs into a bowl and whisk.  Pour into greased pan and cook until the edges are hardened and there is barely any runniness left.
  3. Cover one half of the egg “disc” with the stuffing and fold over.  Keep on heat for just another minute to get everything warmed through, then carefully slide out of pan onto a plate.
  4. Top with avocado and tomato slices.  Eat.  Enjoy.  No more blended salad!  (Don’t get me wrong, I love green smoothies, but that’s a little…much.)


Photo (39)

Breakfast in bed!  Perfection!!  What is your favorite omelet stuffing?!


Bacon Bit Egg Bites!

I’ve posted some egg bite recipes before.  I love them because you can whip out a dozen when you have a few minutes to spare, and you have healthy breakfasts for the rest of the week!  Ones with protein to keep your body happy!  Because I love the idea so much, I decided it was far time to create a new adaptation to keep it exciting!  So here is my  new flavor!!  Bacon Egg Bites!

Here’s what you need:

  • 4 Eggs
  • 1-2 Tbsp Unsweetened Almond Milk (Or Greek Yogurt.  Almond Milk makes it more light and airy, yogurt is fluffy but more dense if that makes sense.)
  • 2 Tbsp Cooked Turkey bacon, crumbled
  • 1 Tbsp Red Onion, Minced
  • 1 Tbsp Chives
  • Salt and Pepper
  • Butter for pan


And here’s how you do it:

  1. Preheat oven to 350 degrees.
  2. Crack all the eggs into a bowl.  Add the other ingredients and whisk together until combined and fluffy.
  3. Grease the bottom a mini muffin tin with your butter.
  4. Fill all the cups 3/4 full with the egg mixture.
  5. Slide into your heated oven and cook until starting to brown, and the middles are solid.  This should take between 20 and 30 minutes!!


Yay healthy easy breakfast!!  Enjoy guys!!


Photo-21 Photo-22 Photo-23 Photo-24